今回やること
今回は Amplify + React/Redux アプリに Cognito 認証機能を付けてみます。
簡単なステップを踏めばすぐに認証機能を付けられるので非常に便利です。
auth を追加する
まずは amplify add auth コマンドで auth を追加しましょう。
$ amplify add auth
Using service: Cognito, provided by: awscloudformation

 The current configured provider is Amazon Cognito.

 Do you want to use the default authentication and security configuration? Default configuration
 Warning: you will not be able to edit these selections.
 How do you want users to be able to sign in? Username
 Do you want to configure advanced settings? No, I am done.
Successfully added auth resource amplifysampleapp075e6f74 locally

Some next steps:
"amplify push" will build all your local backend resources and provision it in the cloud
"amplify publish" will build all your local backend and frontend resources (if you have hosting category added) and provision it in the cloud
あとは amplify push です。
$ amplify push
✔ Successfully pulled backend environment dev from the cloud.

Current Environment: dev

| Category | Resource name            | Operation | Provider plugin   |
| -------- | ------------------------ | --------- | ----------------- |
| Auth     | amplifysampleapp075e6f74 | Create    | awscloudformation |
| Function | helloApiLambda           | Update    | awscloudformation |
| Api      | helloApi                 | No Change | awscloudformation |
? Are you sure you want to continue? Yes
Installing dependencies from Pipfile.lock (db4242)…
To activate this project's virtualenv, run pipenv shell.
Alternatively, run a command inside the virtualenv with pipenv run.
⠼ Updating resources in the cloud. This may take a few minutes...

...

✔ All resources are updated in the cloud

$ amplify status

Current Environment: dev

| Category | Resource name            | Operation | Provider plugin   |
| -------- | ------------------------ | --------- | ----------------- |
| Function | helloApiLambda           | No Change | awscloudformation |
| Api      | helloApi                 | No Change | awscloudformation |
| Auth     | amplifysampleapp075e6f74 | No Change | awscloudformation |

REST API endpoint: https://xxxxxxxxx.execute-api.us-west-2.amazonaws.com/dev
なお、上記操作で Congito User Pool が作成されています。
UI コンポーネントをインストールする
Amplify は UI コンポーネントをあらかじめ用意してくれており、これをインポートすることですぐにアプリに認証機能を取り入れることができます。
以下のようにインストールしましょう。
$ npm install @aws-amplify/ui-react アプリに認証機能を組み込む
ここまできたら、あとはアプリ側に UI を組み込んで認証機能をつけるだけです。
なお、以前 は src/index.js から HelloContainer を呼んでましたが、以下のように一旦 App コンポーネントを挟んであげて、withAuthenticator(App) という形で export default することにしました。
import Amplify from "aws-amplify";
import awsExports from "./aws-exports";
import React from 'react';
import ReactDOM from 'react-dom';
import { render } from 'react-dom';
import { createStore, applyMiddleware } from 'redux';
import { Provider } from 'react-redux';
import thunk from 'redux-thunk';
import reducer from './reducers';
import './index.css';
import App from './App';
import * as serviceWorker from './serviceWorker';

Amplify.configure(awsExports);

const store = createStore(
    reducer,
    applyMiddleware(thunk)
);

ReactDOM.render(
  <React.StrictMode>
    <Provider store={store}>
      <App />
    </Provider>
  </React.StrictMode>,
  document.getElementById('root')
);

// If you want your app to work offline and load faster, you can change
// unregister() to register() below. Note this comes with some pitfalls.
// Learn more about service workers: https://bit.ly/CRA-PWA
serviceWorker.unregister(); import React from 'react';
import { withAuthenticator, AmplifySignOut } from '@aws-amplify/ui-react';
import HelloContainer from './containers/HelloContainer';
function App() {
return (
<div>
<AmplifySignOut />
<HelloContainer />
</div>
);
}
export default withAuthenticator(App); 実際にアクセスして試してみましょう。
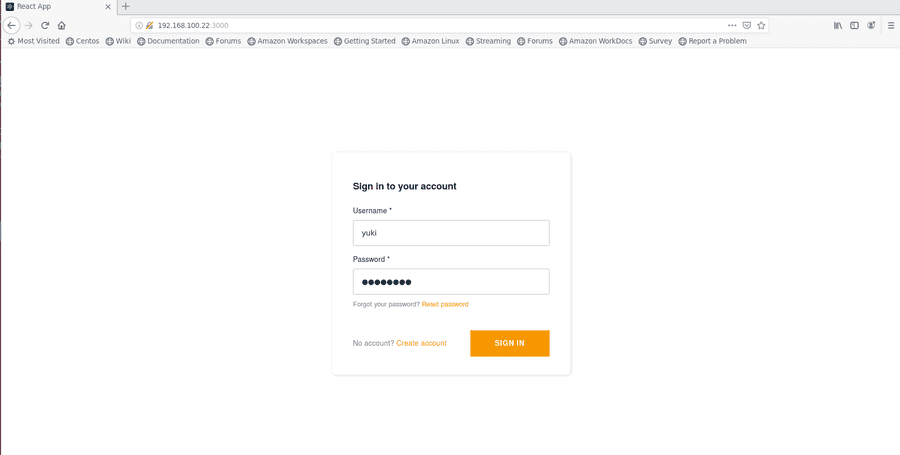
UI 上からサインアップして、作成したアカウントを元にサインインすると、正常に元のアプリ画面に移動できることがわかります。
また、Cognito User Pool からの情報は Auth.currentUserPoolUser() で取得可能です。
以下のようなアクションを定義して、呼び出してみましょう。
import * as actionTypes from '../utils/actionTypes';
import { Auth } from 'aws-amplify';

export const getUserInfo = () => {
  return (dispatch) => {
    dispatch(getUserInfoRequest());

    return Auth.currentUserPoolUser()
      .then(response => dispatch(getUserInfoSuccess(response)))
      .catch(error => dispatch(getUserInfoFailure(error)));
  };
};

export const getUserInfoRequest = () => ({
  type: actionTypes.GET_USER_INFO_REQUEST,
});

export const getUserInfoSuccess = (json) => ({
  type: actionTypes.GET_USER_INFO_SUCCESS,
  response: json,
});

export const getUserInfoFailure = (error) => ({
  type: actionTypes.GET_USER_INFO_FAILURE,
  error: error,
});
container 側も諸々変更します。
import React, { Component }  from 'react';
import { connect } from 'react-redux';
import { bindActionCreators } from 'redux';
import { withAuthenticator, AmplifySignOut } from '@aws-amplify/ui-react';

import * as sayHelloActions from '../actions/sayHello';
import * as getUserInfoActions from '../actions/getUserInfo';
import Button from '../components/Button';
import MessageBox from '../components/MessageBox';

class HelloContainer extends Component {
  render() {
    const { sayHello, getUserInfo, sayHelloActions, getUserInfoActions } = this.props;

    return (
      <div>
        <div>
          <Button onClick={() => sayHelloActions.sayHello()} buttonString="Hello"/>
          <Button onClick={() => getUserInfoActions.getUserInfo()} buttonString="Your Name"/>
        </div>
        <div>
          <MessageBox message={sayHello.message} title="Message from API" />
          <MessageBox message={getUserInfo.userName} title="Your name" />
        </div>
      </div>
   );
  }
}

const mapState = (state, ownProps) => ({
  sayHello: state.sayHello,
  getUserInfo: state.getUserInfo,
});

function mapDispatch(dispatch) {
  return {
    sayHelloActions: bindActionCreators(sayHelloActions, dispatch),
    getUserInfoActions: bindActionCreators(getUserInfoActions, dispatch),
  };
}

export default connect(mapState, mapDispatch)(HelloContainer);
ちゃんとユーザー名が取得できていることがわかりますね。
それにしても SIGN OUT ボタン大きすぎますね..。普通にサインアウト用のアクション作って中で API 呼んだ方が良さそうです…。
- Sign up, Sign in & Sign out
https://docs.amplify.aws/lib/auth/emailpassword/q/platform/js

