前回のあらすじ
前回 は Amplify CLI を用いてバックエンド API の作成を行いました。
今回は GitHub 連携、フロントエンドの開発* デプロイまで進んでみたいと思います。
GitHub 連携
まずはリポジトリを作成し、もろもろやってしまいます。
$ echo "# AmplifySampleApp" >> README.md
$ git init
Reinitialized existing Git repository in /home/ec2-user/AmplifyTest/sample-app/.git/
$ git add .
$ git commit -m "first commit"
$ git branch -M main
$ git remote add origin https://github.com/U-PIN/AmplifySampleApp.git
$ git push -u origin main
Amplify における Github 連携は Amplify Console から行う必要があります。
すでにアプリは作成されていると思うので、コンソール上で GitHub リポジトリと接続しておきます。
なお、今回 Lambda は Python で記述していますが、Amplify Console で用意されている Amazon Linux 2 のビルドイメージでは Python 3.8.x 及び pipenv ががインストールされておらず、ビルドに失敗します。
[ ビルドログ ]
2020-10-04T20:55:37.557Z [INFO]: python3 found but version Python 3.7.4 is less than the minimum required version.
                                 You must have python >= 3.8 installed and available on your PATH as "python3". It can be installed from https://www.python.org/downloads
                                 You must have pipenv installed and available on your PATH as "pipenv". It can be installed by running "pip3 install --user pipenv".
2020-10-04T20:55:37.558Z [WARNING]: ✖ An error occurred when pushing the resources to the cloud
                                    ✖ There was an error initializing your environment.
2020-10-04T20:55:37.560Z [INFO]: Failed to pull the backend.
2020-10-04T20:55:37.562Z [INFO]: Missing required dependencies to package helloApiLambda
2020-10-04T20:55:37.569Z [INFO]: Error: Missing required dependencies to package helloApiLambda
                                 at buildResource (/root/.nvm/versions/node/v10.16.0/lib/node_modules/@aws-amplify/cli/node_modules/amplify-provider-awscloudformation/src/build-resources.js:30:11)
                                 at process._tickCallback (internal/process/next_tick.js:68:7)
2020-10-04T20:55:37.580Z [ERROR]: !!! Build failed
2020-10-04T20:55:37.580Z [ERROR]: !!! Non-Zero Exit Code detected
なので、一旦バックエンドの preBuild を以下のように記述して回避します。(本来であれば Python 3.8.x/pipenv がインストールされたビルドイメージを作成してそれを指定する方が良いです)
version: 1
backend:
  phases:
    preBuild:
      commands:
        - export BASE_PATH=$(pwd)
        - yum install -y gcc openssl-devel bzip2-devel libffi-devel python3.8-pip
        - cd /opt && wget https://www.python.org/ftp/python/3.8.2/Python-3.8.2.tgz
        - cd /opt && tar xzf Python-3.8.2.tgz
        - cd /opt/Python-3.8.2 && ./configure --enable-optimizations
        - cd /opt/Python-3.8.2 && make altinstall
        - pip3.8 install --user pipenv
        - ln -fs /usr/local/bin/python3.8 /usr/bin/python3
        - ln -fs /usr/local/bin/pip3.8 /usr/bin/pip3
        - cd $BASE_PATH
    build:
      commands:
        - '# Execute Amplify CLI with the helper script'
        - amplifyPush --simple
frontend:
  phases:
    preBuild:
      commands:
        - npm ci
    build:
      commands:
        - npm run build
  artifacts:
    baseDirectory: build
    files:
      - '**/*'
  cache:
    paths:
      - node_modules/**/*
フロントエンドの開発
さて、いよいよフロントエンドの開発です。
まずは Button コンポーネントと MessageBox コンポーネントを作成します。
import React from 'react';
import PropTypes from 'prop-types';

const Button = ({onClick})  => (
    <button onClick={onClick}>Show message</button>
);

Button.propTypes = {
    onClick: PropTypes.func.isRequired,
};

export default Button; import React from 'react';
const MessageBox = ({ message }) => (
<div>#### { message }</div>
);
export default MessageBox; 次に actionType を定義します。
export const SAY_HELLO_REQUEST = 'SAY_HELLO_REQUEST';
export const SAY_HELLO_SUCCESS = 'SAY_HELLO_SUCCESS';
export const SAY_HELLO_FAILURE = 'SAY_HELLO_FAILURE'; で、src/actions/index.js にアクションを定義していきます。
API は API メソッドで呼び出すことが可能です。
import * as actionTypes from '../utils/actionTypes';
import Amplify, { API } from 'aws-amplify';

export const sayHello = () => {

  return (dispatch) => {
    const apiName = 'helloApi';
    const path = '/hello';

    dispatch(sayHelloRequest());

    return API.get(apiName, path)
      .then(response => dispatch(sayHelloSuccess(response)))
      .catch(error => dispatch(sayHelloFailure(error)));
  };
};

export const sayHelloRequest = () => ({
  type: actionTypes.SAY_HELLO_REQUEST,
});

export const sayHelloSuccess = (json) => ({
  type: actionTypes.SAY_HELLO_SUCCESS,
  response: json
});

export const sayHelloFailure = (error) => ({
  type: actionTypes.SAY_HELLO_FAILURE,
  error: error,
});
次に reducer で action の実装を行います。
import * as actionTypes from '../utils/actionTypes';

const initialAppState = {
    message: "",
};

const sayHello = (state = initialAppState, action) => {

  switch (action.type) {
  case actionTypes.SAY_HELLO_REQUEST:
    console.log(action.type);

    return {
      ...state,
    };

  case actionTypes.SAY_HELLO_SUCCESS:
    console.log(action.type);
    console.log(action);

    return {
      ...state,
      message: action.response.message
    }

  case actionTypes.SAY_HELLO_FAILURE:
    console.log(action.type);

    return {
      ...state,
      error: action.error
    }

  default:
    return state;
  }
};
export default sayHello; import { combineReducers } from 'redux';
import sayHello from './sayHello';
const reducer = combineReducers({
sayHello,
});
export default reducer; あとはメインの container となる HelloContainer を実装していきます。
import React, { Component }  from 'react';
import { connect } from 'react-redux';
import { bindActionCreators } from 'redux';

import * as actions from '../actions';
import Button from '../components/Button';
import MessageBox from '../components/MessageBox';

class HelloContainer extends Component {
    render() {
        const { sayHello, actions } = this.props;

        return (
            <div>
              <div>
                <Button onClick={actions.sayHello}/>
              </div>
              <div>
                <MessageBox message={sayHello.message} />
              </div>
            </div>
       );
    }
}

const mapState = (state, ownProps) => ({
    sayHello: state.sayHello,
});

function mapDispatch(dispatch) {
    return {
        actions: bindActionCreators(actions, dispatch),
    };
}

export default connect(mapState, mapDispatch)(HelloContainer);
最後に src/index.js を編集すれば完成です。
import Amplify from "aws-amplify";
import awsExports from "./aws-exports";
import React from 'react';
import ReactDOM from 'react-dom';
import { render } from 'react-dom';
import { createStore, applyMiddleware } from 'redux';
import { Provider } from 'react-redux';
import thunk from 'redux-thunk';
import HelloContainer from './containers/HelloContainer';
import reducer from './reducers';
import './index.css';
import App from './App';
import * as serviceWorker from './serviceWorker';

Amplify.configure(awsExports);

const store = createStore(
    reducer,
    applyMiddleware(thunk)
);

ReactDOM.render(
  <React.StrictMode>
    <Provider store={store}>
      <HelloContainer />
    </Provider>
  </React.StrictMode>,
  document.getElementById('root')
);

serviceWorker.unregister();
Amplify.configure(awsExports) で設定を読み込んでいます。src/aws-exports.js には API に関する設定等が記載されています。
/* eslint-disable */
// WARNING: DO NOT EDIT. This file is automatically generated by AWS Amplify. It will be overwritten.

const awsmobile = {
    "aws_project_region": "us-west-2",
    "aws_cloud_logic_custom": [
        {
            "name": "helloApi",
            "endpoint": "https://xxxxxxxxxx.execute-api.us-west-2.amazonaws.com/dev",
            "region": "us-west-2"
        }
    ]
};
終わったら npm start でテストしてみましょう。
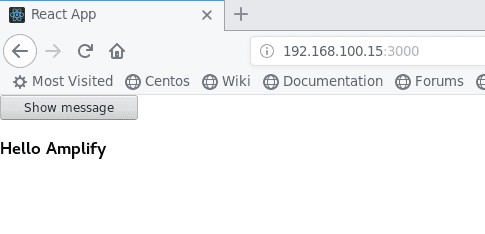
$ npm start dev server が起動しアクセスした際に以下のようなページが表示されれば成功です。(Show message ボタンを押すとメッセージが表示されます)
Amplify Console へのデプロイ
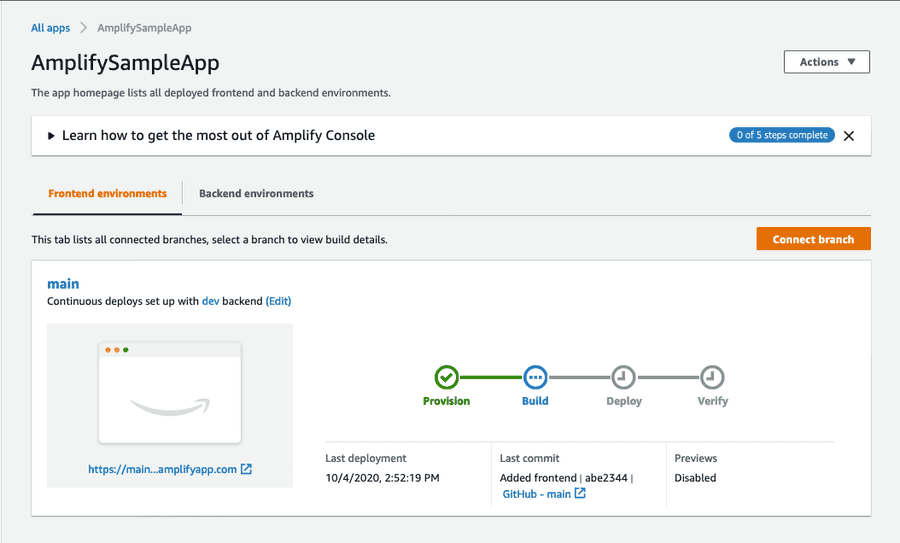
GitHub にプッシュをすれば自動でバックエンドとフロントエンドがビルド* デプロイされます。
$ git add .
$ git commit -m "Added frontend"
[main abe2344] Added frontend
 8 files changed, 153 insertions(+), 1 deletion(-)
 create mode 100644 src/actions/index.js
 create mode 100644 src/components/Button.js
 create mode 100644 src/components/MessageBox.js
 create mode 100644 src/containers/HelloContainer.js
 create mode 100644 src/reducers/index.js
 create mode 100644 src/reducers/sayHello.js
 create mode 100644 src/utils/actionTypes.js
$ git push
これで CI/CD の整備も完了です!

