今回やること
Amazon Linux 2 はオンプレミス仮想化環境にて仮想マシンとして起動が可能です。 本来はオンプレミス上にて開発及びテストを行うためのものではありますが、今回はどのようにオンプレミスで Amazon Linux 2 を起動するかについて記載します。 なお、以下の公式ドキュメントにも手順の記載があります。
(Amazon Linux 2 を仮想マシンとしてオンプレミスで実行する) https://docs.aws.amazon.com/ja_jp/AWSEC2/latest/UserGuide/amazon-linux-2-virtual-machine.html
環境
今回 Hypervisor 側の OS として、Ubuntu 18.04.2 を使用します。 なお、Hyperviosr は KVM です。
$ uname -r
4.18.0-25-generic
$ cat /etc/os-release
NAME="Ubuntu"
VERSION="18.04.2 LTS (Bionic Beaver)"
ID=ubuntu
ID_LIKE=debian
PRETTY_NAME="Ubuntu 18.04.2 LTS"
VERSION_ID="18.04"
HOME_URL="https://www.ubuntu.com/"
SUPPORT_URL="https://help.ubuntu.com/"
BUG_REPORT_URL="https://bugs.launchpad.net/ubuntu/"
PRIVACY_POLICY_URL="https://www.ubuntu.com/legal/terms-and-policies/privacy-policy"
VERSION_CODENAME=bionic
UBUNTU_CODENAME=bionic
seed.iso 起動イメージの準備
1. 下準備
まずは seed.iso 起動イメージを準備します。genisoimage パッケージをインストールし、seed config 用のディレクトリを用意しておきましょう。
$ sudo apt-get install genisoimage
$ mkdir seedconfig
2. meta-data の作成
次に、seedconfig ディレクトリ配下に以下の meta-data ファイルを作成します。なお、今回は eth0 の設定はコメントアウトしてます。
$ cat meta-data
local-hostname: AmazonLinux2_Test
#network-interfaces: |
#iface eth0 inet static
#address 192.168.xx.xx
#network 192.168.xx.0
#netmask 255.255.255.0
#broadcast 192.168.xx.255
#gateway 192.168.xx.2
3. user-data の作成
次に seedconfig ディレクトリ配下で user-data ファイルを作成します。
$ cat user-data
#cloud-config
users:
  - default
chpasswd:
  list: |
    ec2-user:P@ssword
ssh_pwauth: True
locale: en_US.UTF-8

runcmd:
  - [ cp, /usr/share/zoneinfo/America/Pacific, /etc/localtime]
ssh_pwauth: True としておくことで、初回起動時に SSH 接続によるパスワード認証が可能となります。
4. seed.iso イメージファイルの作成
最後に genisoimage コマンドにより、ISO ファイルを作成します。
$ genisoimage -output seed_test.iso -volid cidata -joliet -rock user-data meta-data
I: -input-charset not specified, using utf-8 (detected in locale settings)
Total translation table size: 0
Total rockridge attributes bytes: 331
Total directory bytes: 0
Path table size(bytes): 10
Max brk space used 0
183 extents written (0 MB)
Amazon Linux 2 仮想マシンイメージのダウンロード
今回は KVM なので、KVM 用のイメージをダウンロードします。
$ wget https://cdn.amazonlinux.com/os-images/2.0.20190612/kvm/amzn2-kvm-2.0.20190612-x86_64.xfs.gpt.qcow2
--2019-07-20 18:05:06--  https://cdn.amazonlinux.com/os-images/2.0.20190612/kvm/amzn2-kvm-2.0.20190612-x86_64.xfs.gpt.qcow2
Resolving cdn.amazonlinux.com (cdn.amazonlinux.com)… 13.224.2.35, 13.224.2.78, 13.224.2.39, …
Connecting to cdn.amazonlinux.com (cdn.amazonlinux.com)|13.224.2.35|:443… connected.
HTTP request sent, awaiting response… 200 OK
Length: 1571094528 (1.5G) [binary/octet-stream]
Saving to: ‘amzn2-kvm-2.0.20190612-x86_64.xfs.gpt.qcow2’

amzn2-kvm-2.0.20190612-x86_64.xfs.gpt.qcow2           26%[==============================>                                                                                        ] 402.64M  46.6MB/s    eta 23s
仮想マシンの作成
さて、いよいよ仮想マシンの作成です。今回は virt-manager を使用します。 早速 **[Create a new virtual machine] **から仮想マシンを作成してみましょう。
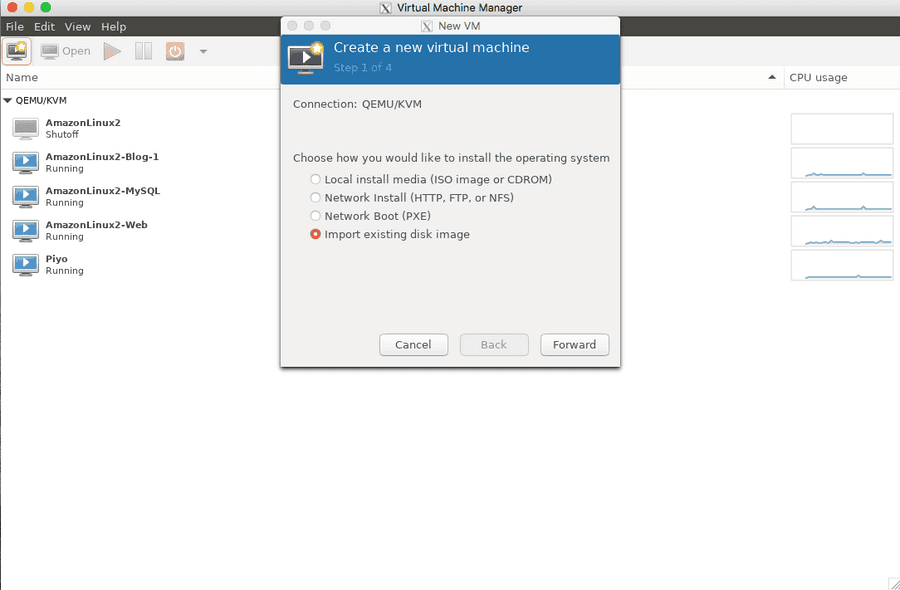
Step 1 では **[Import existing disk image]** を選択します。
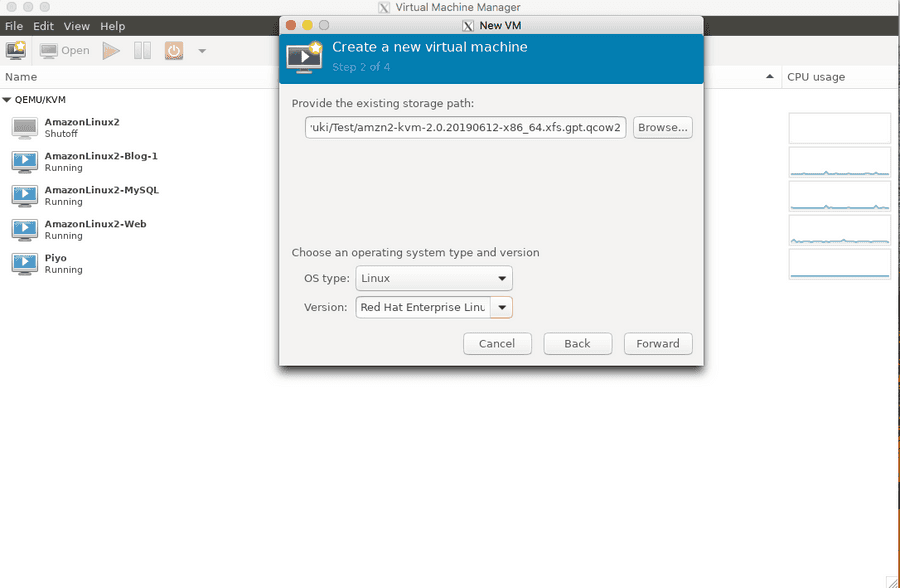
Step 2 ではダウンロードした Amazon Linux 2 の qcow2 イメージを指定します。
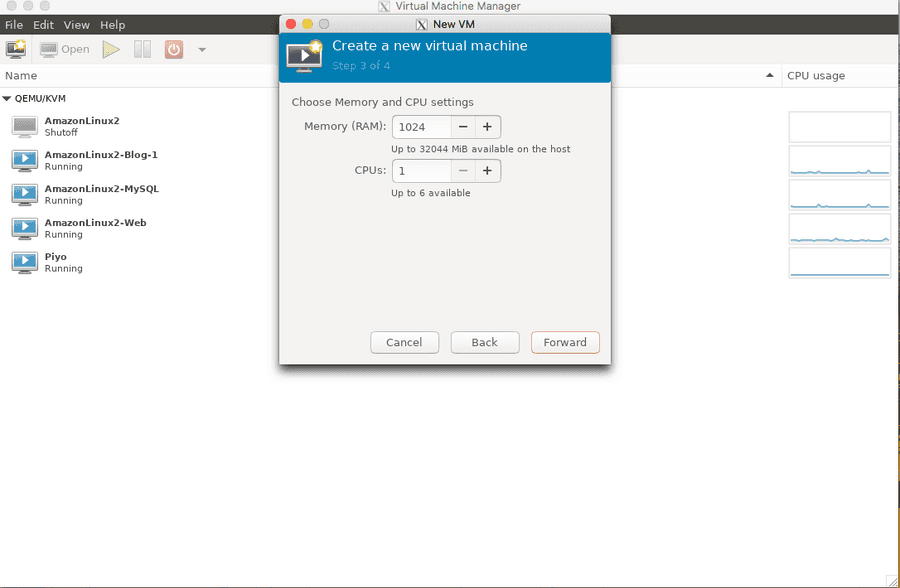
Step 3 ではメモリと CPU を指定します。
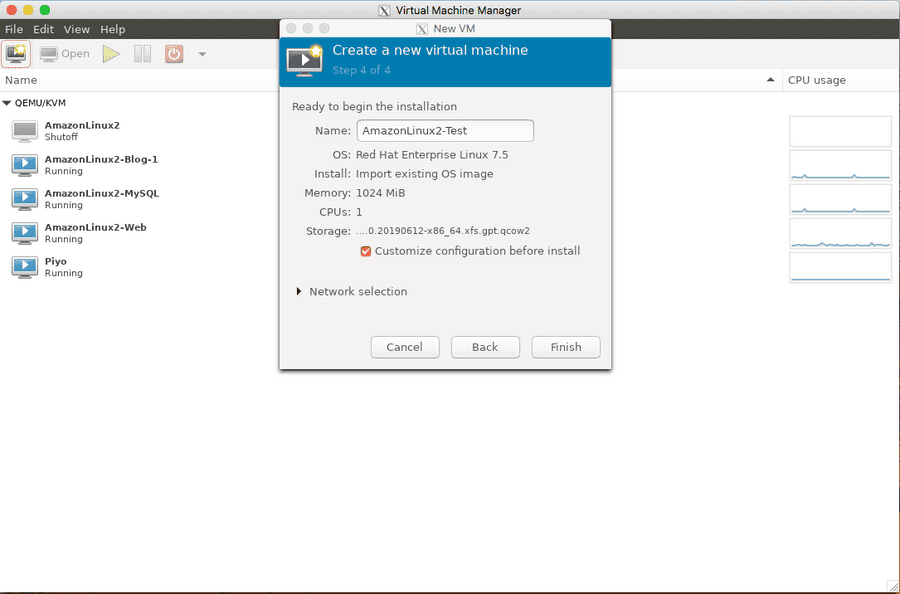
Step 4 では名前を設定し、seed.iso イメージを読み込ませるため**、[Customize configuration before install]** にチェックを入れておきます。
次に、[Add Hardware] を選択し、先に作成した seed_test.iso イメージファイルを CDROM device type として設定しておきます。
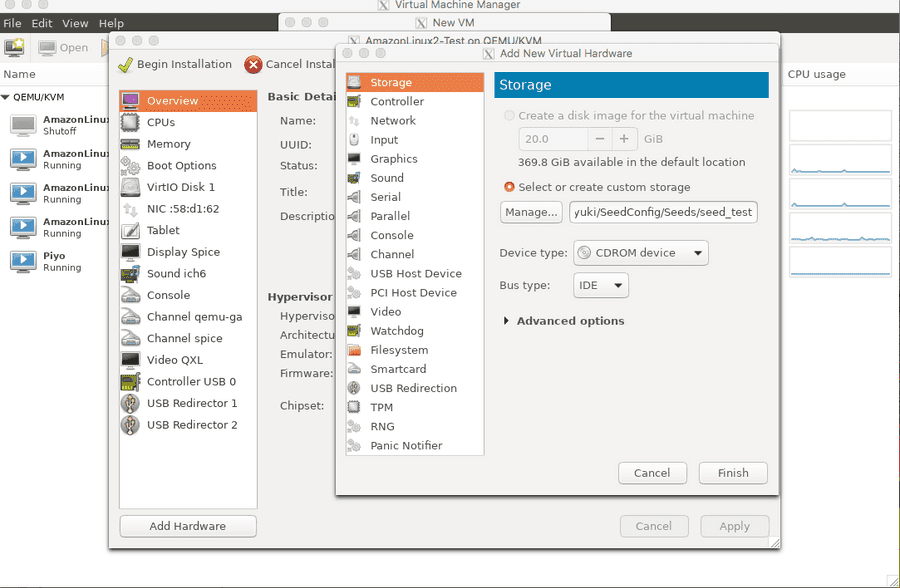
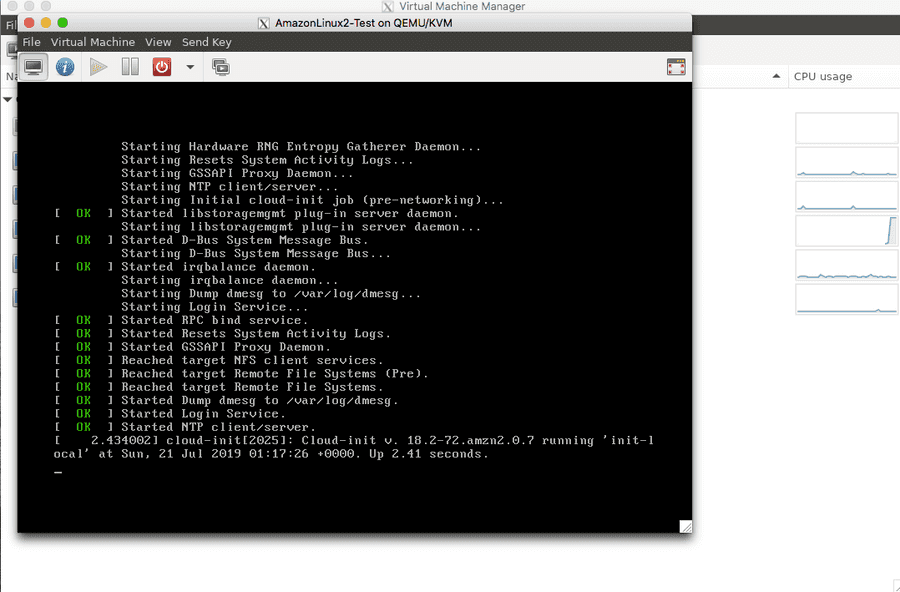
で、[Begin Installation] からインストールを開始します。
実際にアクセスしてみる
実際に SSH でアクセスしてみましょう。 なお、コンソール接続した際に ifconfig 等から IP アドレスを確認しておきます。
$ ssh ec2-user@192.168.100.16
ec2-user@192.168.100.16's password:
Last login: Sun Jul 21 01:20:18 2019 from 192.168.100.15
 __|  __|_ )
 _|  (    /   Amazon Linux 2 AMI
 ___|\___|___|
https://aws.amazon.com/amazon-linux-2/
No packages needed for security; 5 packages available
Run "sudo yum update" to apply all updates.
ログイン出来ました。 素敵な Amazon Linux 2 ライフを!