Oracle Enterprise Manager Cloud Control とは
Oracle Enterprise Manager Cloud Control (以下 EMCC) とは複数のサーバーに配置された複数の Oracle データベースや Oracle データベース以外の製品を総合的に管理できるツールです。管理対象となるサーバーには Oracle Management Agent というプログラムを配置する必要があります。Oracle データベースの起動や停止などの EM Express からは実行できない操作を含め、原則的にほぼすべての Oracle データベースの管理作業を実行できます。
利用する環境
今回 EMCC をインストールする環境は RHEL 7.9 (AMI: ami-02d40d11bb3aaf3e5) です。
$ cat /etc/os-release
NAME="Red Hat Enterprise Linux Server"
VERSION="7.9 (Maipo)"
ID="rhel"
ID_LIKE="fedora"
VARIANT="Server"
VARIANT_ID="server"
VERSION_ID="7.9"
PRETTY_NAME="Red Hat Enterprise Linux Server 7.9 (Maipo)"
ANSI_COLOR="0;31"
CPE_NAME="cpe:/o:redhat:enterprise_linux:7.9:GA:server"
HOME_URL="https://www.redhat.com/"
BUG_REPORT_URL="https://bugzilla.redhat.com/"

REDHAT_BUGZILLA_PRODUCT="Red Hat Enterprise Linux 7"
REDHAT_BUGZILLA_PRODUCT_VERSION=7.9
REDHAT_SUPPORT_PRODUCT="Red Hat Enterprise Linux"
REDHAT_SUPPORT_PRODUCT_VERSION="7.9"
なお、後述するリポジトリデータベースは Amazon Linux 2 に Oracle データベース (ソフトウェア) をインストールする で利用した Amazon Linux 2 上に作成します。
$ uname -r
4.14.252-195.483.amzn2.x86_64
$ cat /etc/os-release
NAME="Amazon Linux"
VERSION="2"
ID="amzn"
ID_LIKE="centos rhel fedora"
VERSION_ID="2"
PRETTY_NAME="Amazon Linux 2"
ANSI_COLOR="0;33"
CPE_NAME="cpe:2.3:o:amazon:amazon_linux:2"
HOME_URL="https://amazonlinux.com/"
必要なファイルダウンロード
まずは ここ から EMCC のインストールに必要となる以下のファイルを全てダウンロードします。
- em13500_linux64.bin
- em13500_linux64-2.zip
- em13500_linux64-3.zip
- em13500_linux64-4.zip
- em13500_linux64-5.zip
EMCC は内部で保有するデータを別途 Oracle データベース (リポジトリデータベース) に保存するため、新規で管理用の Oracle データベースを作成する必要があります。そのため、以下のテンプレートファイルを ここ からダウンロードしておきます。
- 19_11_0_0_0_Database_Template_for_EM13_5_0_0_0_Linux_x64.zip
リポジトリデータベースの作成
まずはリポジトリデータベースを作成します。と、その前に SID が重複しないように別途ユーザーを切っておきましょう。
$ sudo useradd emccrepo -g oinstall -G dba
$ sudo passwd emccrepo
後はもろもろの環境変数やパスを通したり等をしておきます。
export ORACLE_BASE=/u01/app/oracle
export ORACLE_HOME=$ORACLE_BASE/product/19.3.0/dbhome_1
export ORACLE_SID=emccrepo

PATH=$PATH:$HOME/.local/bin:$HOME/bin:$ORACLE_HOME/bin
export PATH
まずは、ダウンロードしたテンプレートファイルを配置、解凍します。
$ cp 19_11_0_0_0_Database_Template_for_EM13_5_0_0_0_Linux_x64.zip $ORACLE_HOME/assistants/dbca/templates
$ cd $ORACLE_HOME/assistants/dbca/templates
$ unzip 19_11_0_0_0_Database_Template_for_EM13_5_0_0_0_Linux_x64.zip
Archive:  19_11_0_0_0_Database_Template_for_EM13_5_0_0_0_Linux_x64.zip
  inflating: set_repo_param_19_11_0_0_0_Database_SQL_for_EM13_5_0_0_0_Large_deployment.sql
  inflating: set_repo_param_19_11_0_0_0_Database_SQL_for_EM13_5_0_0_0_Medium_deployment.sql
  inflating: set_repo_param_19_11_0_0_0_Database_SQL_for_EM13_5_0_0_0_Small_deployment.sql
  inflating: shpool_19_11_0_0_0_Database_SQL_for_EM13_5_0_0_0.sql
  inflating: 19_11_0_0_0_Database_Template_for_EM13_5_0_0_0_Large_deployment.dbc
  inflating: 19_11_0_0_0_Database_Template_for_EM13_5_0_0_0_Medium_deployment.dbc
  inflating: 19_11_0_0_0_Database_Template_for_EM13_5_0_0_0_Small_deployment.dbc
  inflating: 19_11_0_0_0_Database_Template_for_EM13_5_0_0_0.dfb
  inflating: 19_11_0_0_0_Database_Template_for_EM13_5_0_0_0.ctl
次に dbca を起動し、リポジトリデータベースをテンプレートから作成しましょう。Select Database Creation Mode では [Advanced configuration] を選択し、あとは以下のように値を入力していきます。
| オプション | 値 |
|---|---|
| Template name | 19_11_0_0_0_Database_Template_for_EM13_5_0_0_0_Small_deployment.dbc |
| Gloabl Database Name | emccrepo.us-west-2.compute.internal |
| SID | emccrepo |
| Select Database Storage Option | Use template file for database storage attributes |
| Select Fast Recovery Option | 何にもチェックしない |
| Network Configuration | [Create a new listner] にチェックを入れ、LISTENER_EMCCREPO / 1522 で作成 |
| Data Vault Option | 何にもチェックしない |
| Configuration Option | デフォルトのまま |
| Specify Management Options | デフォルトのまま |
| Specify Database User Credentials | SYS/SYSTEM のパスワードを入力 |
| Select Database Creation Option | [Craete database] にチェックが入っていることを確認 |
なお、リスナーを新規で作成しているのは以前自分がデータベースを DBCA で作成した際に listner.ora が作成されておらず、既存のものを選べなかったからです。作成すれば良いのですが、そこに気付いておらず無理やり別のポートで作成しました…。なので普通に listener.ora が作成されている場合は既存のものから選択するので良いと思います。(参考)
入力が終わって Summary 画面が表示されたら [Finish] をクリックし、データベースの作成を開始します。データベースの作成が完了したらリスナーの状態を確認し、起動していなかったら起動しましょう。
$ lsnrctl status LISTENER_EMCCREPO

LSNRCTL for Linux: Version 19.0.0.0.0 - Production on 22-FEB-2022 06:28:40

Copyright (c) 1991, 2019, Oracle.  All rights reserved.

Connecting to (DESCRIPTION=(ADDRESS=(PROTOCOL=TCP)(HOST=ip-10-3-0-181.us-west-2.compute.internal)(PORT=1522)))
STATUS of the LISTENER
------------------------
Alias                     LISTENER_EMCCREPO
Version                   TNSLSNR for Linux: Version 19.0.0.0.0 - Production
Start Date                22-FEB-2022 06:18:19
Uptime                    0 days 0 hr. 10 min. 21 sec
Trace Level               off
Security                  ON: Local OS Authentication
SNMP                      OFF
Listener Parameter File   /u01/app/oracle/product/19.3.0/dbhome_1/network/admin/listener.ora
Listener Log File         /u01/app/oracle/diag/tnslsnr/ip-10-3-0-181/listener_emccrepo/alert/log.xml
Listening Endpoints Summary...
  (DESCRIPTION=(ADDRESS=(PROTOCOL=tcp)(HOST=ip-10-3-0-181.us-west-2.compute.internal)(PORT=1522)))
  (DESCRIPTION=(ADDRESS=(PROTOCOL=ipc)(KEY=EXTPROC1522)))
  (DESCRIPTION=(ADDRESS=(PROTOCOL=tcps)(HOST=ip-10-3-0-181.us-west-2.compute.internal)(PORT=5501))(Security=(my_wallet_directory=/u01/app/oracle/admin/emccrepo/xdb_wallet))(Presentation=HTTP)(Session=RAW))
Services Summary...
Service "emccrepo.us-west-2.compute.internal" has 1 instance(s).
  Instance "emccrepo", status READY, has 1 handler(s) for this service...
Service "emccrepoXDB.us-west-2.compute.internal" has 1 instance(s).
  Instance "emccrepo", status READY, has 1 handler(s) for this service...
The command completed successfully
EMCC インストールの前準備
ここまで来たら EMCC をインストールするホスト側の作業です。まずはユーザー及びディレクトリの作成を行います。
$ sudo groupadd oinstall
$ sudo groupadd dba
$ sudo useradd emcc -g oinstall -G dba
$ sudo passwd emcc
$ su emcc
$ mkdir -p /u01/app/oracle/emcc/middleware
$ mkdir -p /u01/app/oracle/emcc/agent13cまた、.bash_profile に以下の設定を加えておきます。
export ORACLE_BASE=/u01/app/oracle
export ORACLE_HOME=/u01/app/oracle/emcc/middleware
export MW_HOME=/u01/app/oracle/emcc/middleware
export WL_HOME=/u01/app/oracle/emcc/middleware/wlserver

PATH=$PATH:$HOME/.local/bin:$HOME/bin:$ORACLE_HOME/bin:$MW_HOME/bin
export PATH

alias cdo="cd $ORACLE_HOME"
次にスワップ領域を作成しておきます。
$ sudo dd if=/dev/zero of=/swapfile bs=128M count=128
$ sudo chmod 600 /swapfile
$ sudo mkswap /swapfile
$ sudo swapon /swapfile
最後に必要なパッケージをインストールしておきます。
$ sudo yum install gcc glibc-develEMCC13c のインストール
それではいよいよインストールです。まずはダウンロードしたインストーラ起動用の実行ファイルに対して実行権限を付与します。
$ chmod +x em13500_linux64.binで、このファイルを実行すると GUI のインストーラーが起動します。
$ ./em13500_linux64.bin
Launcher log file is /tmp/OraInstall2022-02-22_07-18-13AM/launcher2022-02-22_07-18-13AM.log.
Extracting the installer . . . . . . . . . . . . . . . . . . . . . . . . . . . . . . . . . . . . . . . . . . . . . . . . . . . . . . . . . . . . . . . . . . . . . . . . . . . . . . . . . . . . . . . . . . . . . . . . . Done
Checking monitor: must be configured to display at least 256 colors.  Actual unknown.   Failed <<<<
Checking swap space: must be greater than 512 MB.   Actual 16383 MB    Passed
Checking if this platform requires a 64-bit JVM.   Actual 64    Passed (64-bit not required)

Some system prerequisite checks failed.
You must fulfill these requirements before continuing.

Continue? (yes [y] / no [n]) [n]
y
You have confirmed that the product can be installed on this platform.
Continuing with the installation.
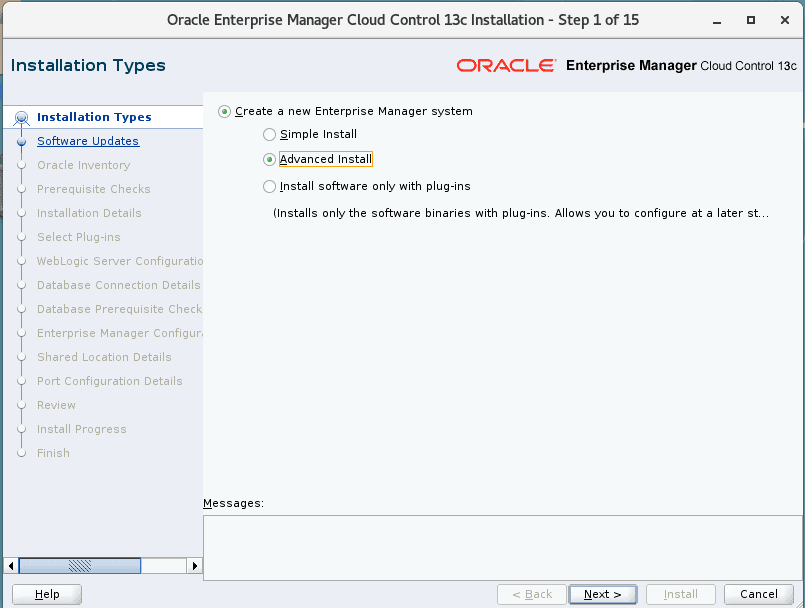
今回は Advanced Install で進めます。
Installation Types
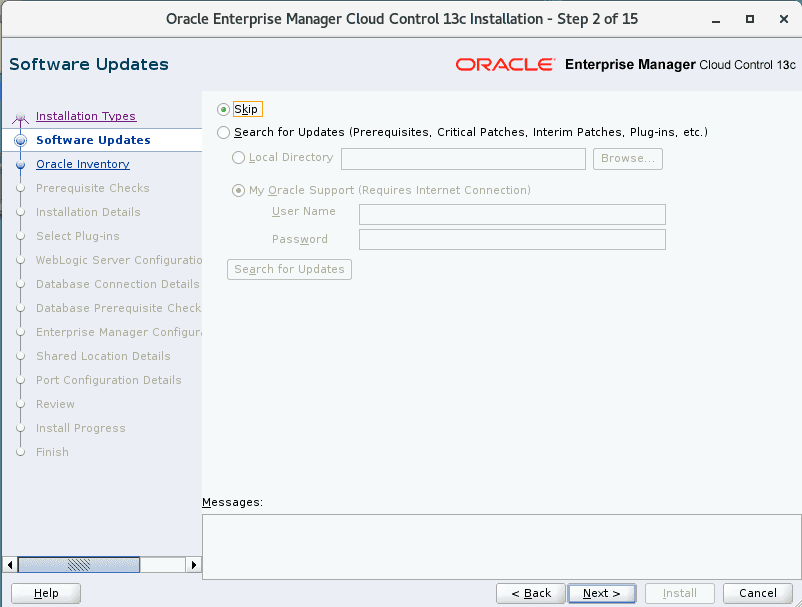
次にソフトウェアアップデートですが、今回はアップデートしないので Skip を選択します。
Software Updates
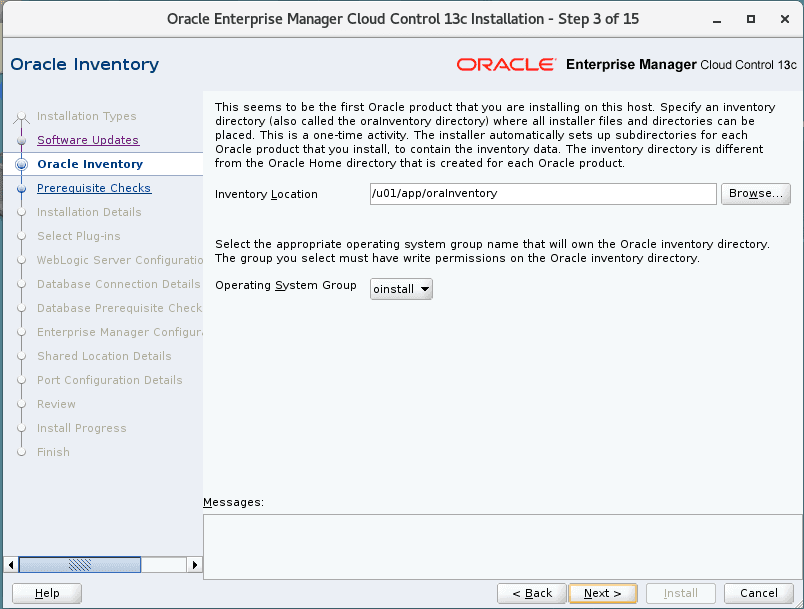
Oracle Inventory のディレクトリはデフォルトにしておきます。
Oracle Inventory
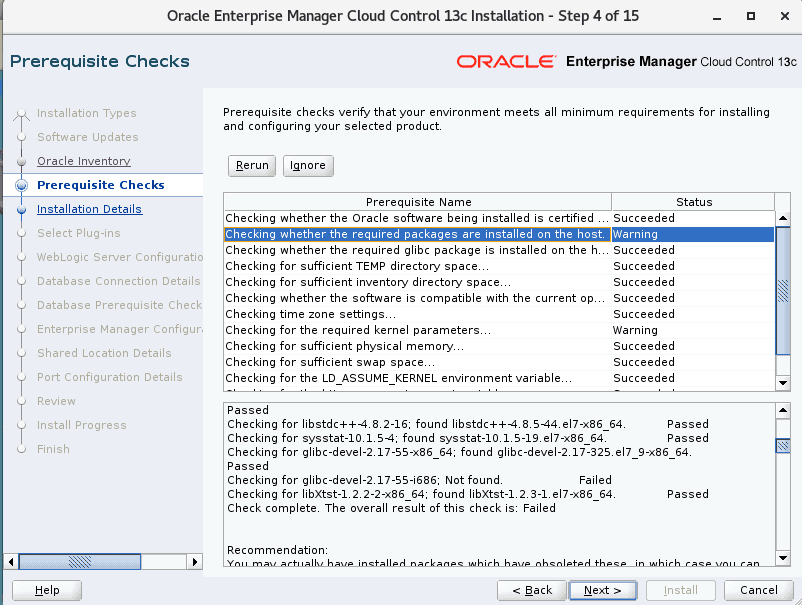
前提条件のチェックが行われます。とりあえず良さそうであれば (適当) 次に進みます。
Prerequisite Checks
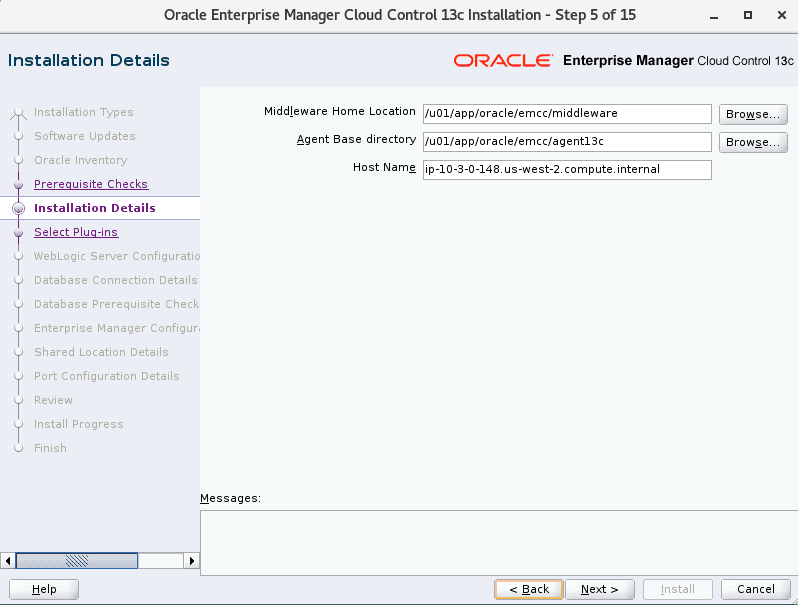
インストールディレクトリを設定します。今回は以下の通りです。
| 対象 | ディレクトリ |
|---|---|
| Middleware Home Locaton | /u01/app/oracle/emcc/middleware |
| Agent Base directory | /u01/app/oracle/emcc/agent13c |
Installation Details
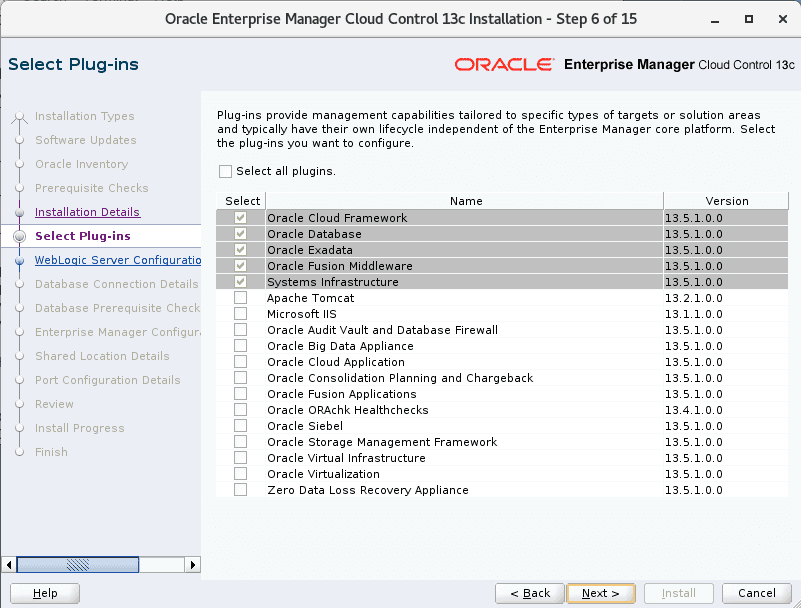
プラグインはデフォルトのままにします。
Select Plug-ins
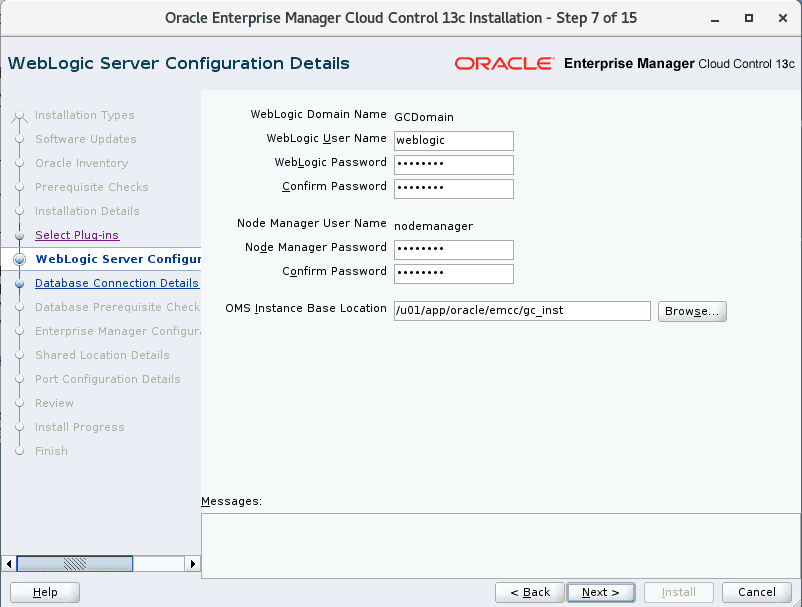
Weblogic User 及び Node Manager User のパスワードを入力します。なお、OMS Instance Base Location はデフォルトのままにします。
WebLogic Server Configuration Details
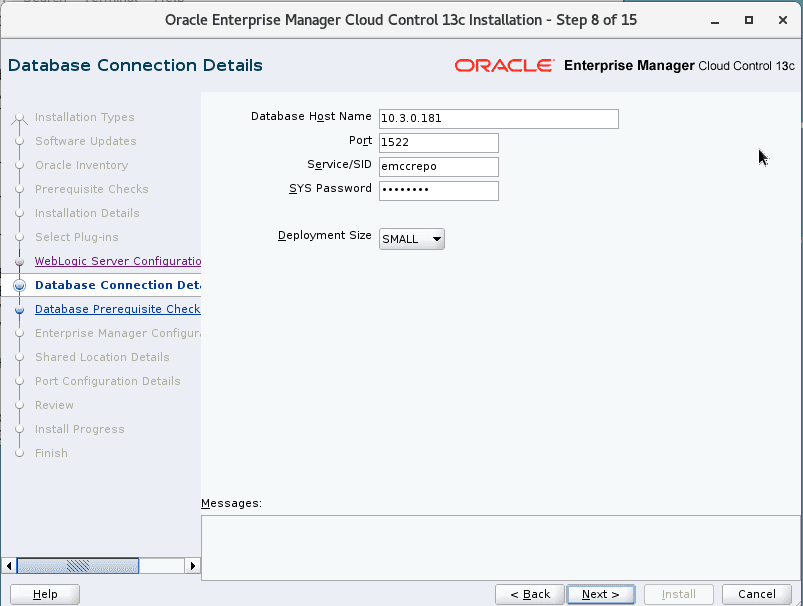
先に作成したリポジトリデータベースの情報を入力します。次に進むと前提確認の結果が見られます。
Database Connection Details
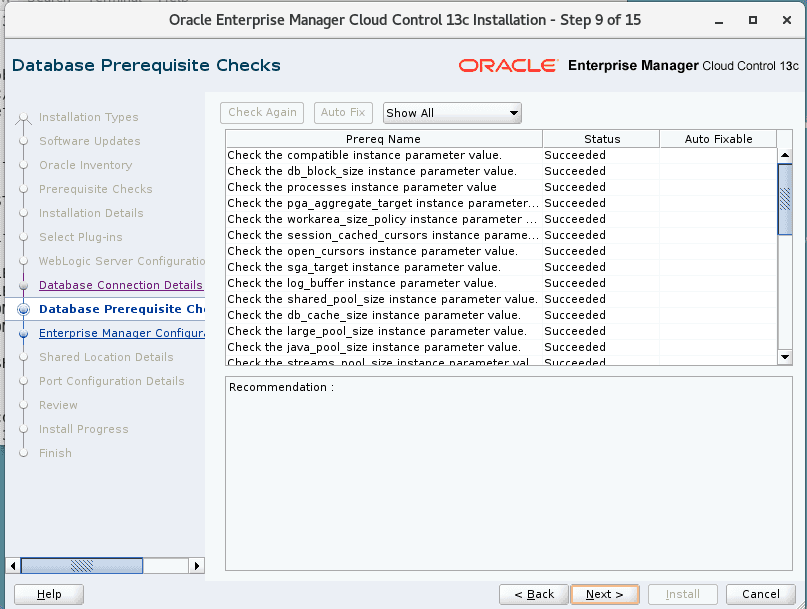
Database Prerequisite Checks
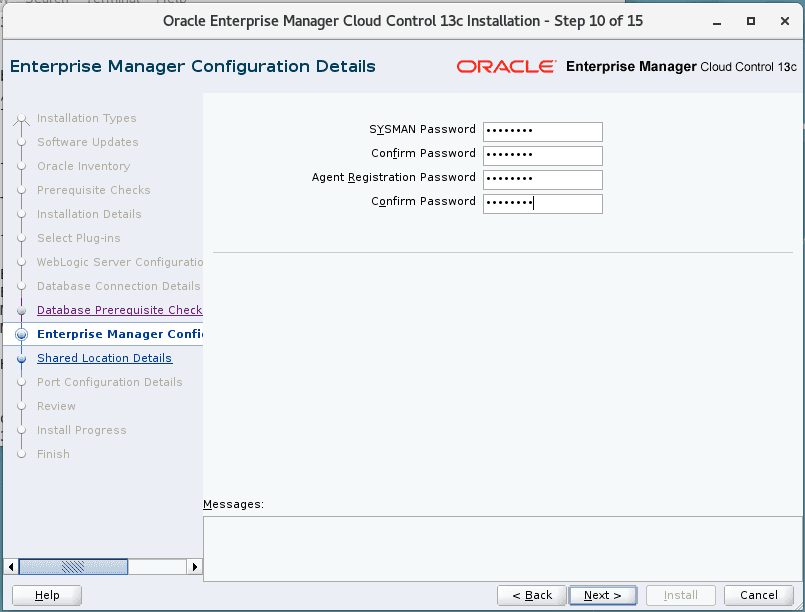
EMCC ユーザー (SYSMAN 及び Agent Registration) のパスワードを設定します。
Enterprise Manager Configuration Details
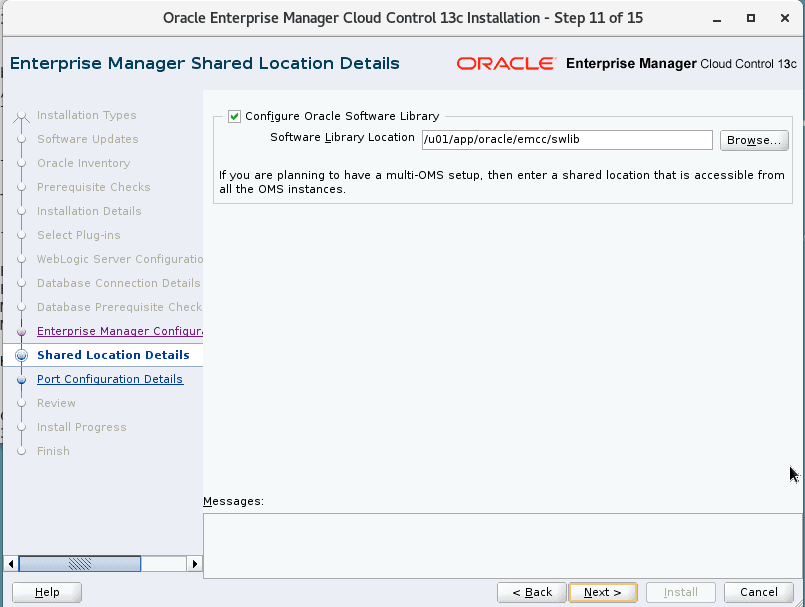
Software Library Location はデフォルトのままにします。
Enterprise Manager Shared Location Details
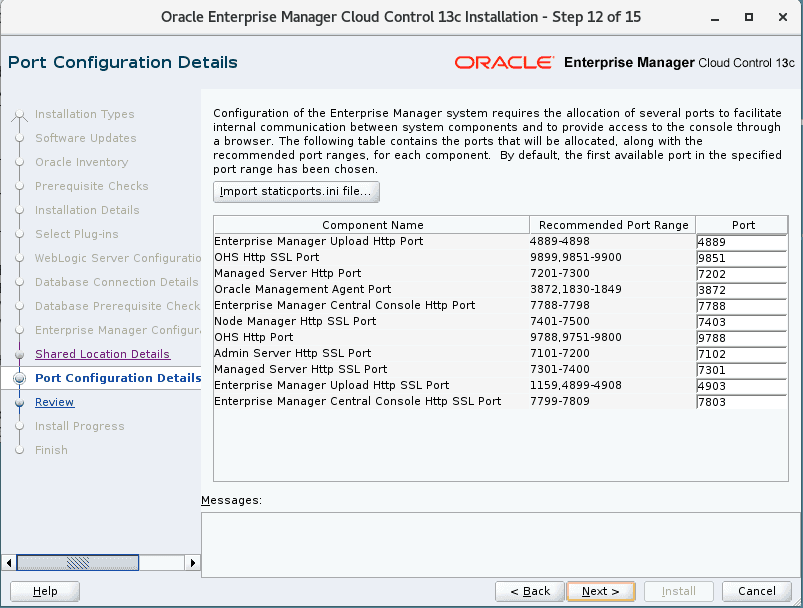
それぞれのプロセスポート設定もデフォルトのままにしておきます。
Port Configuration Details
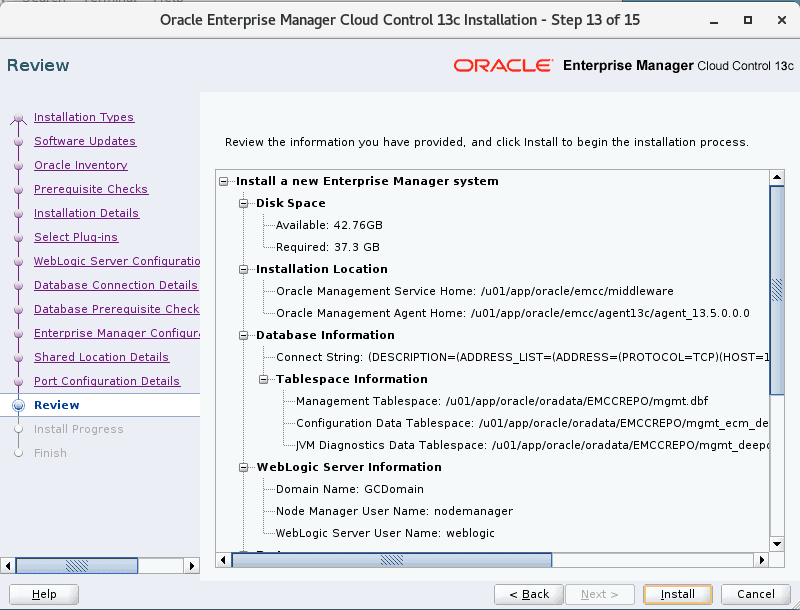
最終的に問題がなければ [Install] をクリックします。
Review
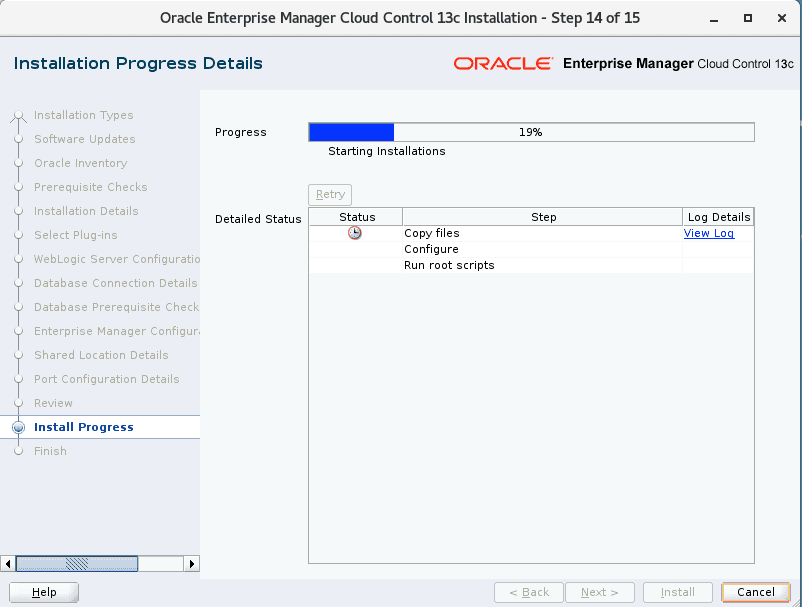
Installation Progress Details
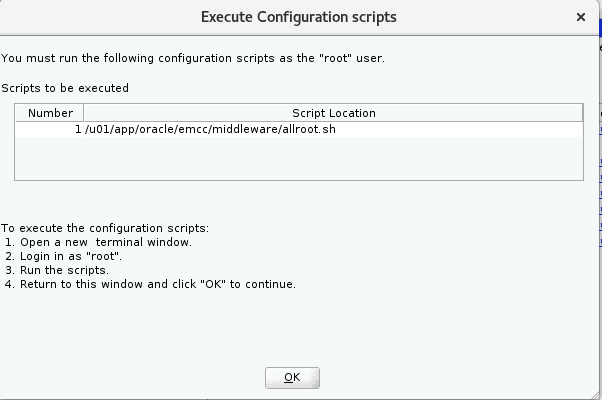
途中、以下のようにスクリプトを実行するように言われるので、実行します。
Execute Configuration scripts
$ sudo su
# /u01/app/oracle/emcc/middleware/allroot.sh

Starting to execute allroot.sh .........

Starting to execute /u01/app/oracle/emcc/middleware/root.sh ......
Check /u01/app/oracle/emcc/middleware/install/root_ip-10-3-0-148.us-west-2.compute.internal_2022-02-22_15-42-09.log for the output of root script

Finished product-specific root actions.
/etc exist
Finished execution of  /u01/app/oracle/emcc/middleware/root.sh ......


Starting to execute /u01/app/oracle/emcc/agent13c/agent_13.5.0.0.0/root.sh ......

Finished product-specific root actions.
/etc exist
Finished execution of  /u01/app/oracle/emcc/agent13c/agent_13.5.0.0.0/root.sh ......
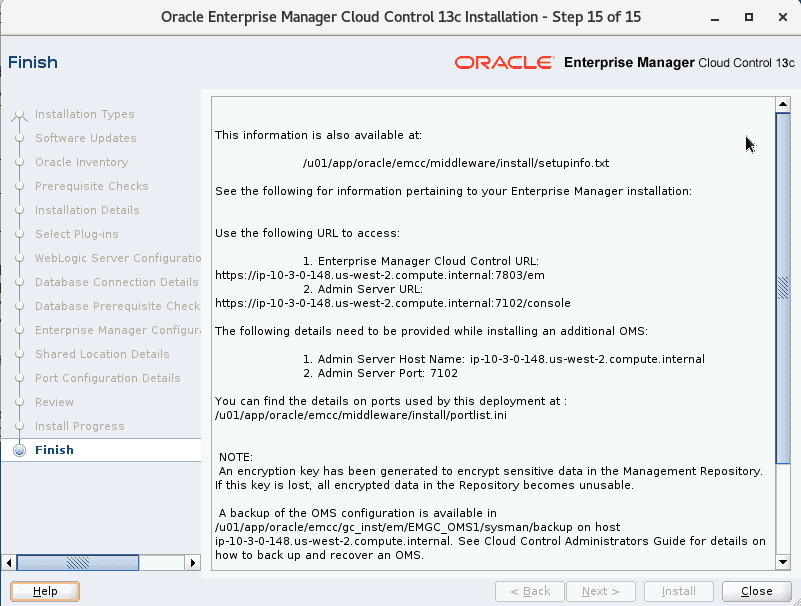
終わったらアクセス用の URL 等が表示されます。これで完了です。
Finish
接続テスト
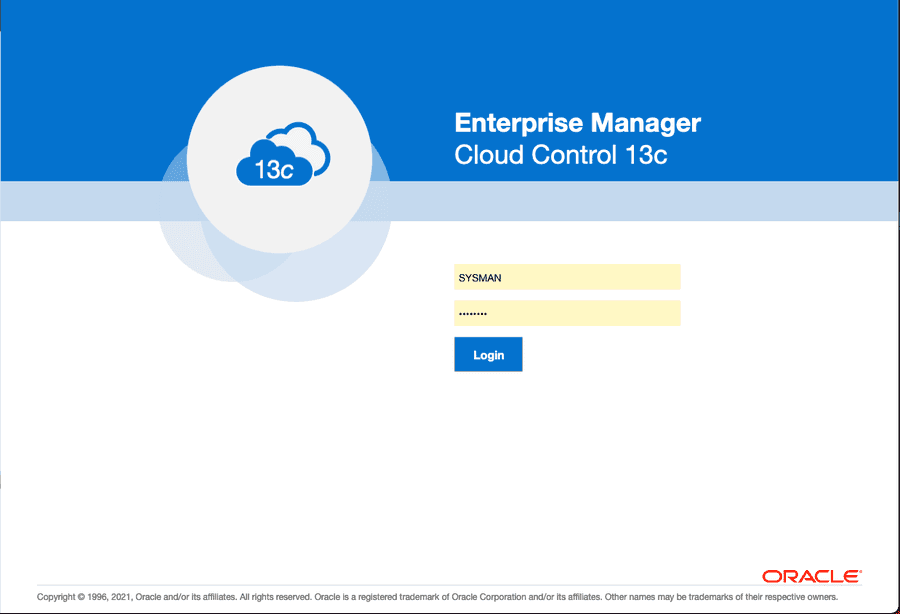
ブラウザから https://[IP Address]:7803/em にアクセスし、以下のログインページに到達できれば OK です。
トラブルシューティング
ブラウザからアクセスした際に Enterprise Manager Cloud Control is not currently available. The EMGCOMS server where Cloud Control runs, or some other component, might be down. _ という旨のエラーが出力された際はまず状況を確認しましょう。
まずはリポジトリデータベースが起動しているかを見ます。
$ lsnrctl status LISTENER_EMCCREPO

LSNRCTL for Linux: Version 19.0.0.0.0 - Production on 08-MAR-2022 13:57:35

Copyright (c) 1991, 2019, Oracle.  All rights reserved.

Connecting to (DESCRIPTION=(ADDRESS=(PROTOCOL=TCP)(HOST=ip-10-3-0-181.us-west-2.compute.internal)(PORT=1522)))
STATUS of the LISTENER
------------------------
Alias                     LISTENER_EMCCREPO
Version                   TNSLSNR for Linux: Version 19.0.0.0.0 - Production
Start Date                08-MAR-2022 13:42:41
Uptime                    0 days 0 hr. 14 min. 54 sec
Trace Level               off
Security                  ON: Local OS Authentication
SNMP                      OFF
Listener Parameter File   /u01/app/oracle/product/19.3.0/dbhome_1/network/admin/listener.ora
Listener Log File         /u01/app/oracle/diag/tnslsnr/ip-10-3-0-181/listener_emccrepo/alert/log.xml
Listening Endpoints Summary...
  (DESCRIPTION=(ADDRESS=(PROTOCOL=tcp)(HOST=ip-10-3-0-181.us-west-2.compute.internal)(PORT=1522)))
  (DESCRIPTION=(ADDRESS=(PROTOCOL=ipc)(KEY=EXTPROC1522)))
  (DESCRIPTION=(ADDRESS=(PROTOCOL=tcps)(HOST=ip-10-3-0-181.us-west-2.compute.internal)(PORT=5501))(Security=(my_wallet_directory=/u01/app/oracle/admin/emccrepo/xdb_wallet))(Presentation=HTTP)(Session=RAW))
Services Summary...
Service "emccrepo.us-west-2.compute.internal" has 1 instance(s).
  Instance "emccrepo", status READY, has 1 handler(s) for this service...
Service "emccrepoXDB.us-west-2.compute.internal" has 1 instance(s).
  Instance "emccrepo", status READY, has 1 handler(s) for this service...
The command completed successfully
それが大丈夫であれば次は OMS (Oracle Management Server) の状態を確認します。
$ emctl status oms
Oracle Enterprise Manager Cloud Control 13c Release 5
Copyright (c) 1996, 2021 Oracle Corporation.  All rights reserved.
WebTier is Up
Oracle Management Server is Down
JVMD Engine is Down
上の例では OMS と JVMD (JVM Diagnostics) エンジンが起動してないようです。以下のコマンドで起動します。
$ emctl start oms
Oracle Enterprise Manager Cloud Control 13c Release 5
Copyright (c) 1996, 2021 Oracle Corporation.  All rights reserved.
Starting Oracle Management Server...
WebTier Successfully Started
Oracle Management Server Successfully Started
Oracle Management Server is Up
JVMD Engine is Up