概要
データの作成や更新、削除といった書き込み操作は Query ではなく Mutation という異なるルート型を使用します。Mutation として利用するスキーマの引数には type キーワードの代わりに input キーワードを使うことが多く、オブジェクト型を簡潔に渡すことが可能となります。
input MovieInput {
  title: String
  director: String
}

type Movie {
  id: ID!
  title: String!
  director: String!
  year: Int!
}

type Query {
  getMovie(id: ID!): Movie
}

type Mutation {
  createMovie(input: MovieInput): Movie
  updateMovie(id: ID!, input: MovieInput): Movie
}
動作の確認
まずは以下のようにスキーマ及びリゾルバを定義します。
server.js
const express = require("express")
const { graphqlHTTP } = require("express-graphql");
const { buildSchema } = require("graphql");

// Defining GraphQL Schema
const schema = buildSchema(`
  input MessageInput {
    content: String
    author: String
  }

  type Message {
    id: ID!
    content: String
    author: String
  }

  type Query {
    getMessage(id: ID!): Message
  }

  type Mutation {
    createMessage(input: MessageInput): Message
    updateMessage(id: ID!, input: MessageInput): Message
  }
`);

// Resolver function
class Message {
  constructor(id, {content, author}) {
    this.id = id;
    this.content = content;
    this.author = author;
  }
}

let fakeDatabase = {};

const root = {
  getMessage: ({id}) => {
    if (!fakeDatabase[id]) {
      throw new Error("no message exists with id: " + id)
    }
    return new Message(id, fakeDatabase[id]);
  },
  createMessage: ({input}) => {
    let id = require("crypto").randomBytes(10).toString("hex");
    fakeDatabase[id] = input;
    return new Message(id, input);
  },
  updateMessage: ({id, input}) => {
    if (!fakeDatabase[id]) {
      throw new Error("no message exists with id: " + id)
    }
    fakeDatabase[id] = input;
    return new Message(id, input);
  }
}


// Launch Express server. Set graphiql: true to use GraphiQL
const app = express();
app.use("/graphql", graphqlHTTP({
  schema: schema,
  rootValue: root,
  graphiql: true
}));
app.listen(4000);
console.log("Running a GraphQL API server at http://localhost:4000/graphql");
で、サーバーを起動します。
$ node server.js
Running a GraphQL API server at http://localhost:4000/graphql
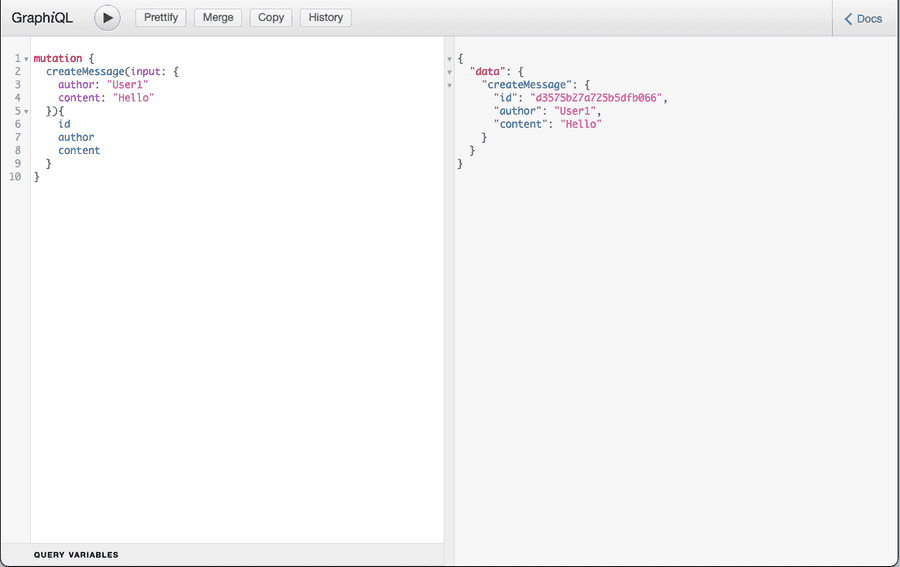
では早速書き込み処理を実行してみましょう。まずは Message の作成から試してみます。以下のクエリを実行してみましょう。
Query
mutation {
  createMessage(input: {
    author: "User1"
    content: "Hello"
  }){
    id
    author
    content
  }
}
レスポンスは以下の形で返却されます。
Response
{
  "data": {
    "createMessage": {
      "id": "d3575b27a725b5dfb066",
      "author": "User1",
      "content": "Hello"
    }
  }
}
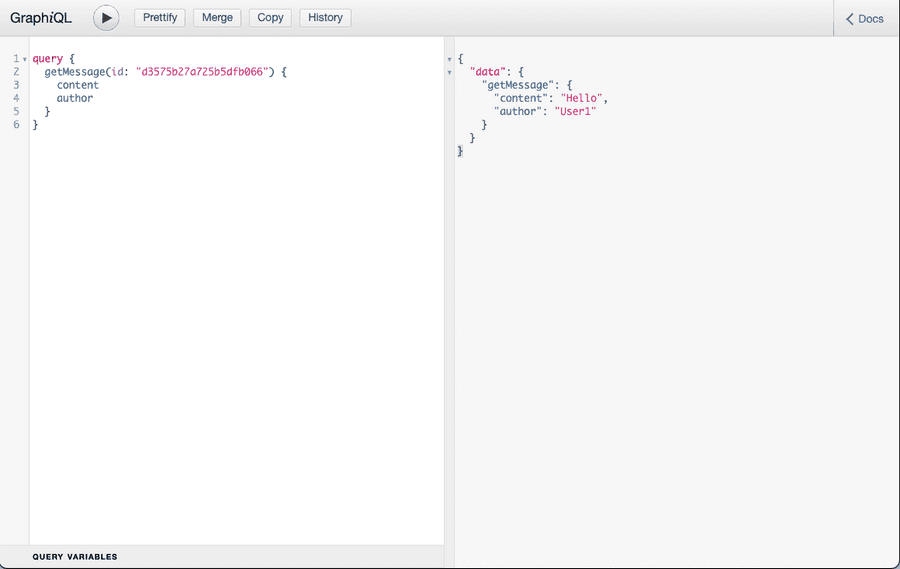
上記で作成したメッセージを読み出してみます。
Query
query {
  getMessage(id: "d3575b27a725b5dfb066") {
    content
    author
  }
}
Response
{
  "data": {
    "getMessage": {
      "content": "Hello",
      "author": "User1"
    }
  }
}
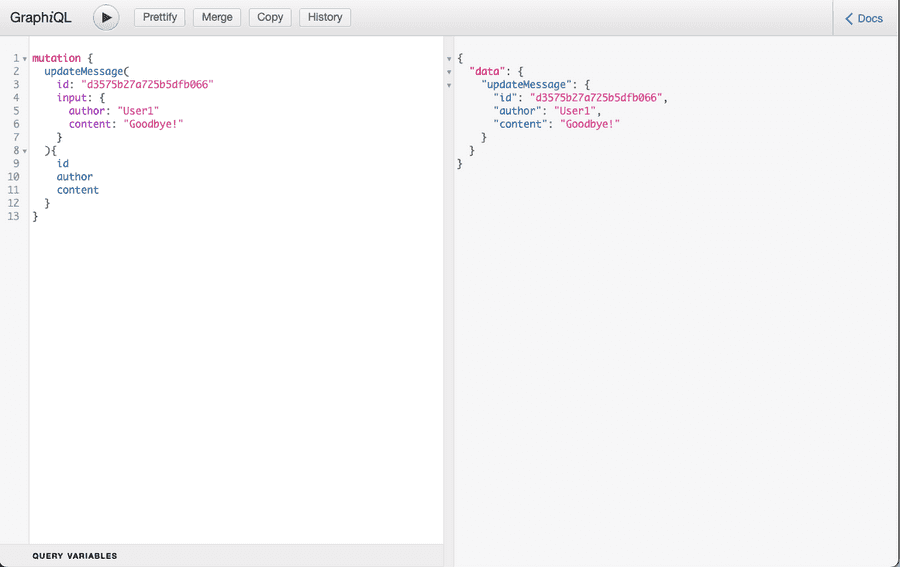
ちゃんと読み出せていますね。それでは更新についても試してみます。
Query
mutation {
  updateMessage(
    id: "d3575b27a725b5dfb066"
    input: {
      author: "User1"
      content: "Goodbye!"
    }
  ){
    id
    author
    content
  }
}
Response
{
  "data": {
    "updateMessage": {
      "id": "d3575b27a725b5dfb066",
      "author": "User1",
      "content": "Goodbye!"
    }
  }
}
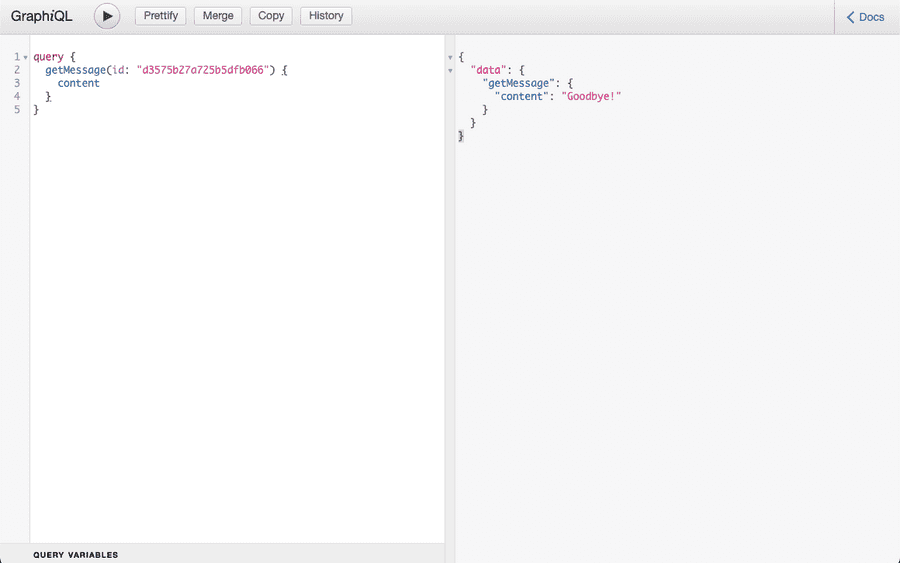
OK ですね。念の為更新が反映されているか確認しましょう。
Query
query {
  getMessage(id: "d3575b27a725b5dfb066") {
    content
  }
}
Response
{
  "data": {
    "getMessage": {
      "content": "Goodbye!"
    }
  }
}
正しく反映されていそうです。


