はじめに
今回は Amazon Linux 2 で React/Redux 環境をセットアップしてみたいと思います。 セットアップといっても大層な事は行わず、ちょちょっとコマンド叩いてプロジェクトディレクトリにパッケージをインストールするだけです。完全にメモ書きです。
環境
OS/Kernel Version 及 npm/node のバージョンは以下になります (古い)。
$ cat /etc/os-release
NAME="Amazon Linux"
VERSION="2"
ID="amzn"
ID_LIKE="centos rhel fedora"
VERSION_ID="2"
PRETTY_NAME="Amazon Linux 2"
ANSI_COLOR="0;33"
CPE_NAME="cpe:2.3:o:amazon:amazon_linux:2"
HOME_URL="https://amazonlinux.com/"
$ npm -v
5.10.0
$ node -v
v8.9.4
プロジェクトの作成
では実際にプロジェクトを作成してみます。 まずは、create-react-app をグローバルインストールしておきます。これによりいい感じにプロジェクトディレクトリを作成できるようになります。
$ npm install -g create-react-app上記コマンドを用いてプロジェクトを作成します。
$ create-react-app hello次に React で Redux を利用するために必要なパッケージ類を追加でインストールします。
$ npm install react-redux reduxで、src 内に色々ディレクトリを作成します。
$ cd hello/src
$ mkdir containers components actions utils reducers
$ tree -L 1
.
|-- actions
|-- App.css
|-- App.js
|-- App.test.js
|-- components
|-- containers
|-- index.css
|-- index.js
|-- logo.svg
|-- reducers
`-- utils

5 directories, 6 files
作成したディレクトリはそれぞれ以下の用途で使用します。
containers:
src/index.js から呼ばれる Container を格納するディレクトリとなる。Container はアプリの一番外側に存在するルート的な役割を担い、ここから各 Component が呼ばれる。
components:
React.js の Component を格納するディレクトリとなり、React/Redux においては Container から呼び出される。
actions:
アプリで必要となる Action (データの状態を変更するためのリクエスト) を格納するディレクトリとなる。
utils:
Action の種類を列挙する actionType.js を格納するディレクトリ。
reducers:
Action のロジック部分である Reducer を格納するディレクトリとなり、Reducer は Action に基づいて新しい状態を返す役割を担う。
アプリケーションの作成
ここで、ボタンを押したら Hello/Goodbye と表示するだけの簡単なアプリケーションを作成してみる。 まずは Container から参照される Component を作成する。今回は押すボタンとなる Bottun と Hello/Goodbye という文字を表示する MessageBox という二つの Component を作成する。
import React from 'react';
import PropTypes from 'prop-types';

const Button = ({onClick})  => (
    <button onClick={onClick}>挨拶する</button>
);

Button.propTypes = {
    onClick: PropTypes.func.isRequired,
};

export default Button;import React from 'react';
const MessageBox = ({ message }) => (
<div><h3>{ message }</h3></div>
);
export default MessageBox;次に、Button Component に prop として渡される onClick 時の Action を定義する。
import * as actionTypes from '../utils/actionTypes';

export const onButtonPush = () => ({
    type: actionTypes.PUSH,
});export const PUSH = 'PUSH';Action が定義できたら Reducer で実装する。 今回 state として message と isHello という値を持たせ、isHello が true の時は Hello! を表示、そうでない場合は GoodBye! を表示することにした。
import * as actionTypes from '../utils/actionTypes';

const initialAppState = {
    message: "",
    isHello: true,
};

const showMessage = (state = initialAppState, action) => {
    console.log(action.type);

    if (action.type === actionTypes.PUSH) {
        if (state.isHello) {
            return {
                ...state,
                message: "Hello!",
                isHello: false,
            };
        } else {
            return {
                ...state,
                message: "GoodBye!",
                isHello: true,
            };
        }
    } else {
        return state;
    }
};

export default showMessage;
また、reducers/index.js は複数の Reducer を複合して使用する場合に備えて用意している ( 今回は 1 つだけ )。
import { combineReducers } from 'redux';
import showMessage from './showMessage';

const reducer = combineReducers({
    showMessage,
});

export default reducer;
あとは Container をゴリゴリ書く。 先ほど作成した Component を呼び出して、State と Dispatcher をマッピングしてって感じ。
import React, { Component }  from 'react';
import { connect } from 'react-redux';
import { bindActionCreators } from 'redux';

import * as actions from '../actions';
import Button from '../components/Button';
import MessageBox from '../components/MessageBox';

class HelloContainer extends Component {
    render() {
        const { showMessage, actions } = this.props;

        return (
            <div>
              <div>
                <Button onClick={actions.onButtonPush}/>
              </div>
              <div>
                <MessageBox message={showMessage.message} />
              </div>
            </div>
        );
    }
}

const mapState = (state, ownProps) => ({
    showMessage: state.showMessage,
});

function mapDispatch(dispatch) {
    return {
        actions: bindActionCreators(actions, dispatch),
    };
}

export default connect(mapState, mapDispatch)(HelloContainer);
最後に src/index.js 内で Store を作成して、Container を呼び出せば完成。 ここでは、Reducer によって変更された状態 (Store) を Container に渡すという動作が行われている。
import React from 'react';
import { render } from 'react-dom';
import { createStore } from 'redux';
import { Provider } from 'react-redux';
import HelloContainer from './containers/HelloContainer';
import reducer from './reducers';

const store = createStore(reducer);

render(
    <Provider store={store}>
      <HelloContainer />
    </Provider>,
  document.getElementById('root')
);
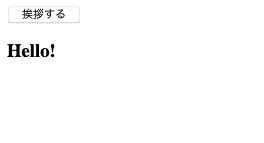
あとは npm start で dev server を起動して、ボタンを押した際に Hello!/GoodBye! が交互に表示されれば OK !
$ npm start

...

Compiled successfully!

The app is running at:

  http://localhost:3000/

Note that the development build is not optimized.
To create a production build, use npm run build.
